|
You plug in your vacuum cleaner and discover that it won’t turn on. After trying a different outlet, you find that it doesn’t work either.
After checking the circuit breakers and finding nothing is tripped, you discover that some of your outlets are working, but others are not.
What to do????
When a house is wired during construction, multiple outlets are added to the same circuit breaker and wired in a “daisy chain” manner.
That means that the wire goes to one outlet and from that outlet, the wire then goes onto another, then another.
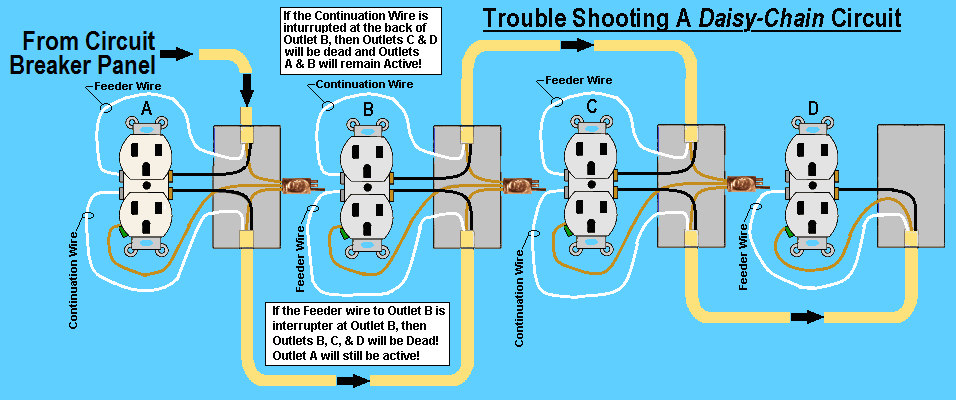
|
Typically you may find about 10 receptacles are all on the same circuit breaker. Problems often occur by how they are connected from one outlet to the other! If the wires are connected using the screw-down terminals on the outlet, rarely does one encounter problems. I did, however, find one case where the home owner had replaced a bathroom light switch and did not screw down the wires tight enough on the screw. It later created an intermittant flickering light problem. So the screws haVe to be tight!
|
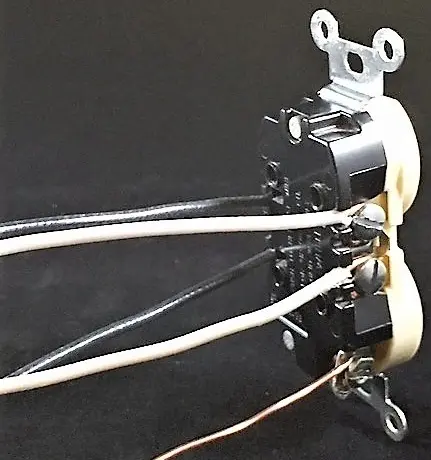
Screw-Down Terminals | 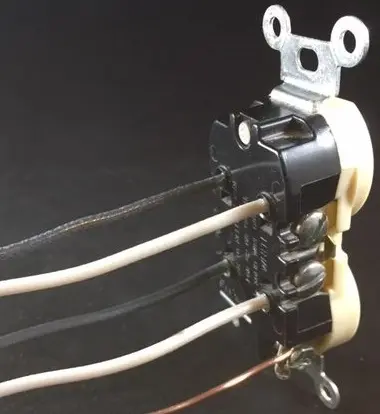
Back Stab-In Connectors
|
|
If, on the other hand, the electrician used the 'quick connect” stab-in connectors, located on the back of each receptacle, there can be problems down the way. The reason is these “stab-in” connectors make the connection to the wire using a thin “stab-on-the-wire” blade. They actually kind of look like a harmonica reed. When a user plugs in a high current device (typically a space heater), the stab connector sometimes can’t survive the high heat of the high current and then fails. With this failure, the rest of the outlets that are in this circuit lose their power source. It’s a break in the “daisy chain”. (I mention a space heater, because as an electrician, this is often the device that I have found that has done the dirty deed)! |
Now to find the “break”! My own method is to first plug in a device into each “dead” outlet (with the power on) and wiggle the plug while it is in the socket. I use my
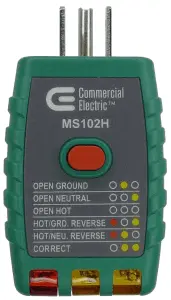
Outlet Tester
but even a lamp cord will work.
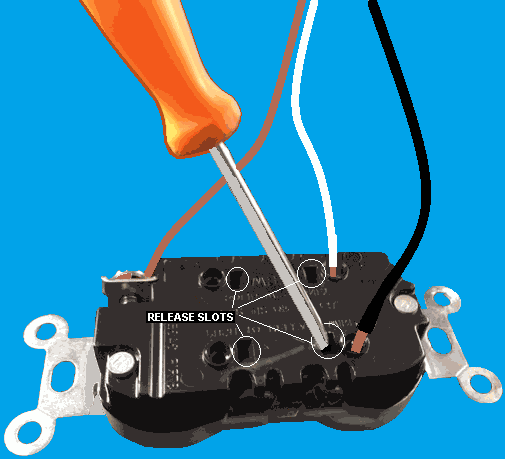
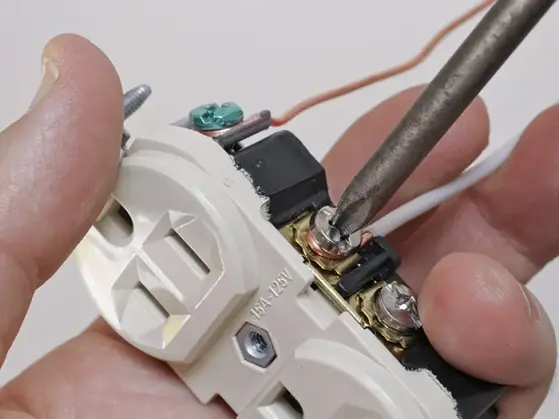
Sometimes the bad connection will reveal itself by working intermittently while one wiggles the plug in the outlet. Now if that test doesn’t reveal the bad spot, then one must open each outlet (with the power OFF) and check the connections in the back of each outlet. Test every dead outlet and the last live outlet upstream of the dead ones that are in that circuit. I suggest that while there at each outlet, change the wiring so that the connections are bolted down with the outlet connection screws and not the silly stab-in connectors! I use a thin screw driver, (an 'Xcelite R3323 Screwdriver'), (a jewelers screw driver works great too), to release the wires from the outlet stabs. NEVER just cut the wires from the outlet. It makes the wires too short to rewire the outlet! And you will get cussed out by the next electrician! I am good at cussing out lazy electrician wannabes who came before me!
Using a small screw driver
To release the attached wires from the receptacle

ALWAYS replace the damaged receptacle
NEVER attempt to re-use it! |
~ Replacing The Receptacle ~ |
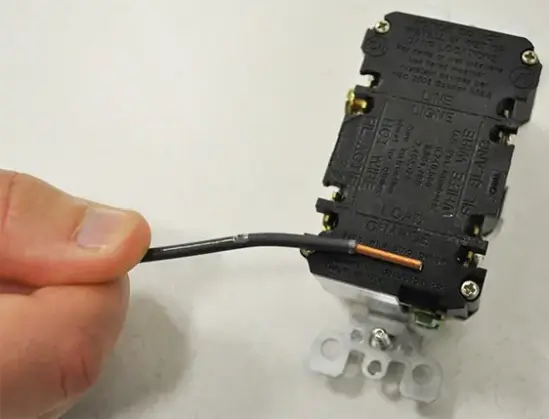
When stripping the wire,
the wire gauge on the back of the receptacle is for the correct
length to insert the bare wire into the 'stab-in' connectors.
One should strip the wire about 1/4-inch more for curling
the wire to attach to the screw-down connectors. |
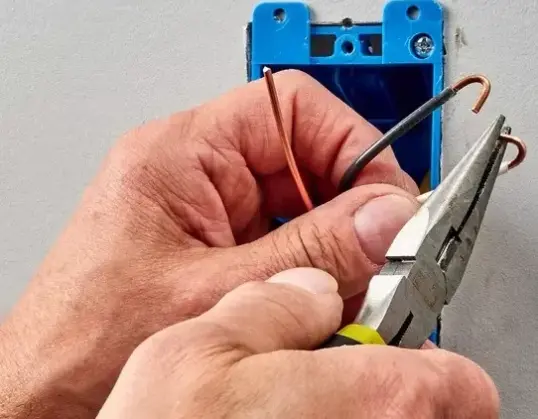
Curling the wire can be accomplished using a needle nose pliers,
as shown here, however some wire strippers have a little hole in it
called a 'loop hole' specifically meant for curling wire. I like using
needle nose myself! There is even a special screw driver with a
little post melded into the handle right at the bunt of the screw
driver for wrapping a wire around the shank of the driver to curl it.
I have one but prefer the needle nose. |
|
|
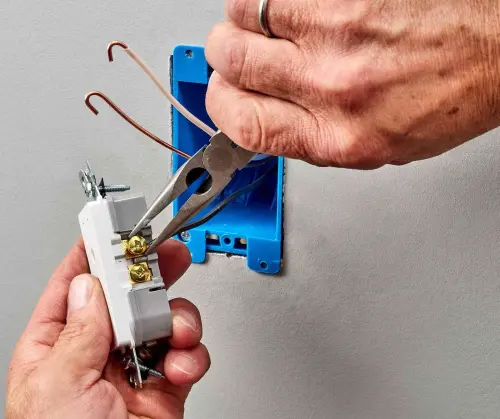
To attach the wire,
First use a screw driver to open the screw on the receptacle all the
way open. Then use needle nose pliers to wrap the wire around
the screw in the clockwise direction! (Note: If the wire is put
on in the counter-clockwise direction, the screw will actually push
the wire back out from under it as one tightens the screw). |
Tighten the screw
First using a phillips screw driver. Then finish the tightening process
using a straight-blade screw driver. The reason is that a phillips head
screw driver typically turns out of the head of the screw as one
tightens down on it. The straight blade does not typiclaly spin out,
so one can get a better 'tighten' on the screw to finish! (-: |
|
|
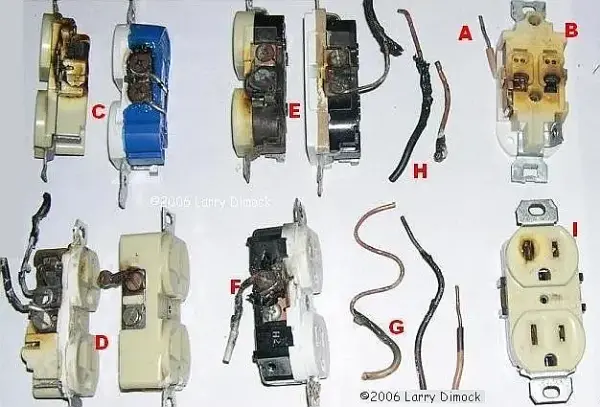
Here are some Fun Pics:
They come from Larry Dimock's web Site, 'The Circuit Detective'
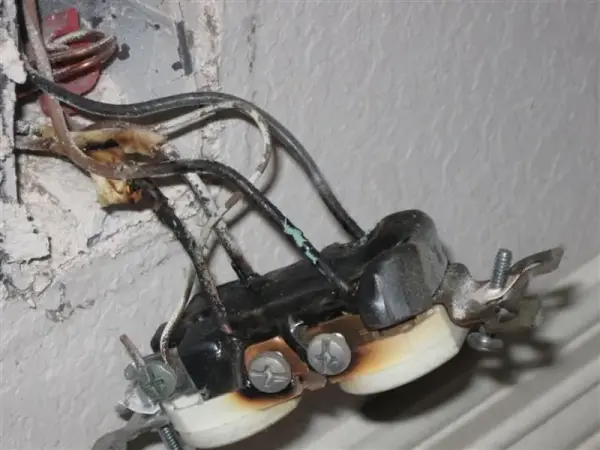
These chared remains are mostly due to loose connections. The most often problem is from a connection on the back 'stab-in'
connection of the receptacle. Some of these pics are from the use of aluminum wire, (which is now not permitted to use), but
mostly from loose screws. What happens is that the loose wire will arc under the loose screw and create heat. A large current
hungry appliance like a blow dryer or worse a space heater usually will reveal these loose connections. What is bad about this
is that the heat is not from an electrical overload, so the circuit breaker will not trip. The heat can just keep going until a fire results.
(It is in my own opinion that the back stab-in connectors should only be used in lighting circuits where there typically isn't such a high current draw)!
Please visit the circuit Detective's webpage. He gives the blow-by-blow descriptions for this graphic!
 |